> For the complete documentation index, see [llms.txt](https://docs.getmesa.com/llms.txt). Markdown versions of documentation pages are available by appending `.md` to page URLs; this page is available as [Markdown](https://docs.getmesa.com/connect/google-forms.md).
# Google Forms
### Configuration
#### Setting up a MESA workflow with a Google Form
When you're setting up a MESA workflow with a Google Form, you will need to complete some steps in order for the workflow to work properly.
{% hint style="warning" %}
You will want to do this for every MESA workflow that has a dedicated [Google Forms trigger.](/workflow-builder/triggers.md)
{% endhint %}
1\. While logged onto your preferred Google account, locate an existing form or create a new form: . If you are logged into multiple Google accounts, this link will use the first account that you are logged into so **please make sure that you are using the correct Google account.**
If you have an existing form, click on the form to edit it.
{% hint style="info" %}
🗒️ For first time Google Forms users, [you can refer to this guide for help with creating your first form.](https://support.google.com/a/users/answer/9303071?hl=en)
{% endhint %}
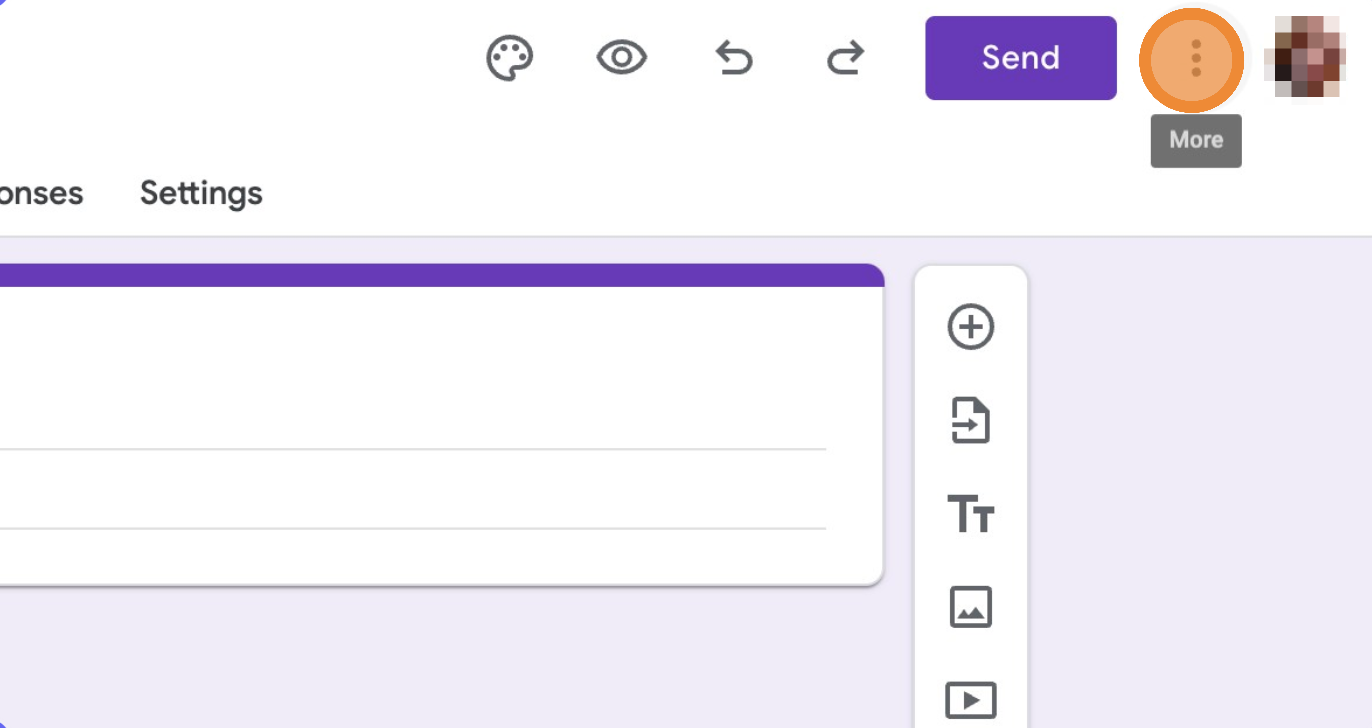
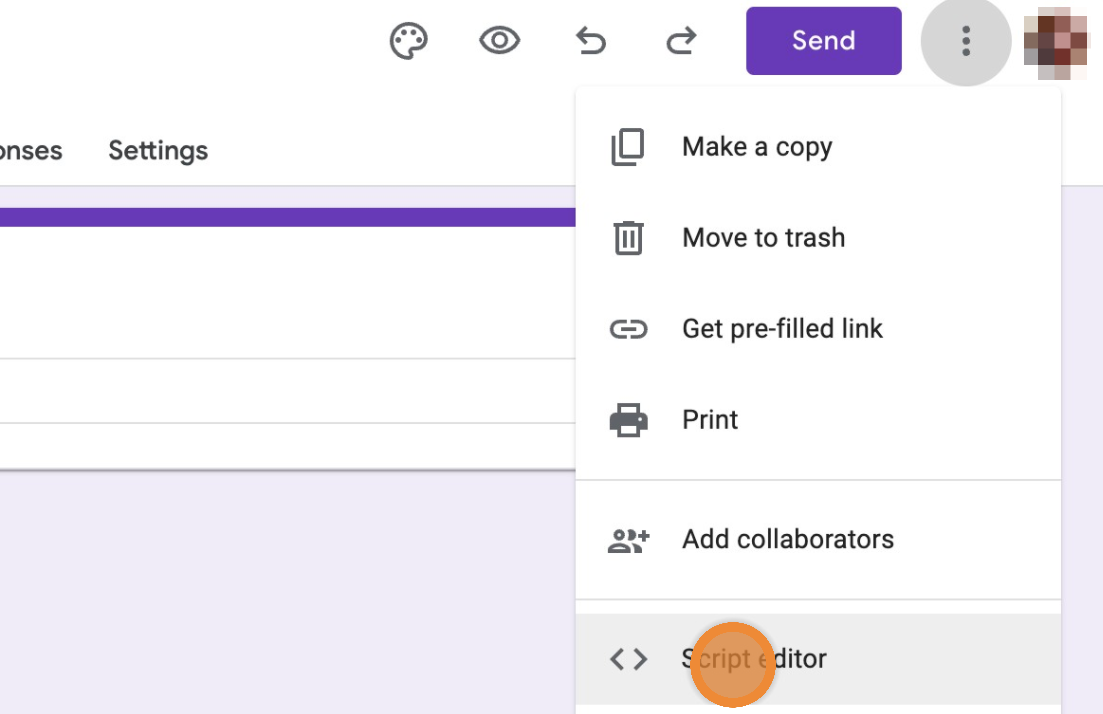
2\. Once you have a Google Form properly set up to your liking and while you are viewing the form, click on the three dotted icon from the top right hand navigation and click on **Script editor**.
3\. In a new tab and back into your MESA workflow, click on your **Google Forms** trigger and click on the **Copy** icon next to the **Webhook Code** field.
4\. Go back to the browser tab with the Google Script editor open.
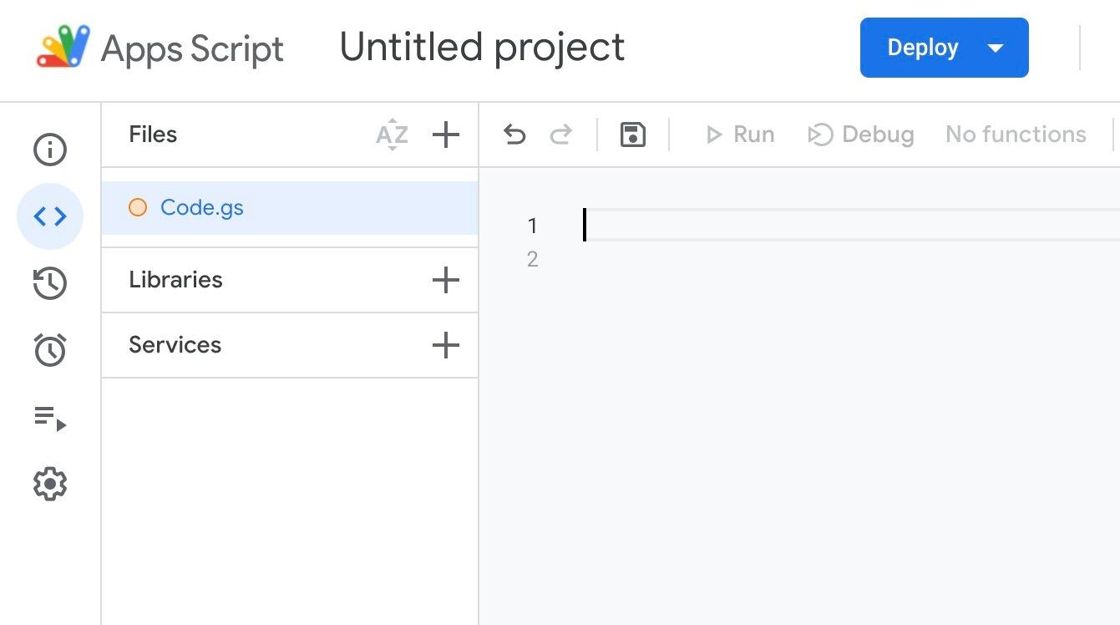
5\. Locate where it says this in the editor
```
function myFunction() {
}
```
Erase everything in the editor.
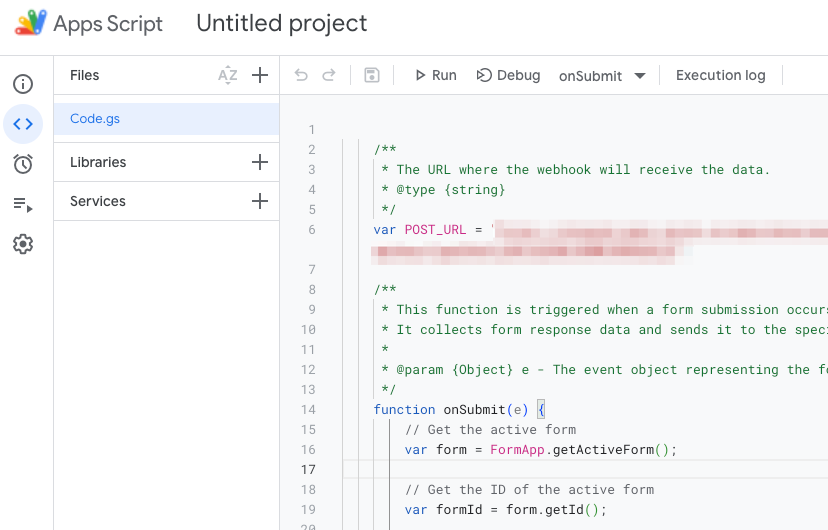
6\. Then, paste what you just copied from the MESA workflow. It should look something like this in the editor:
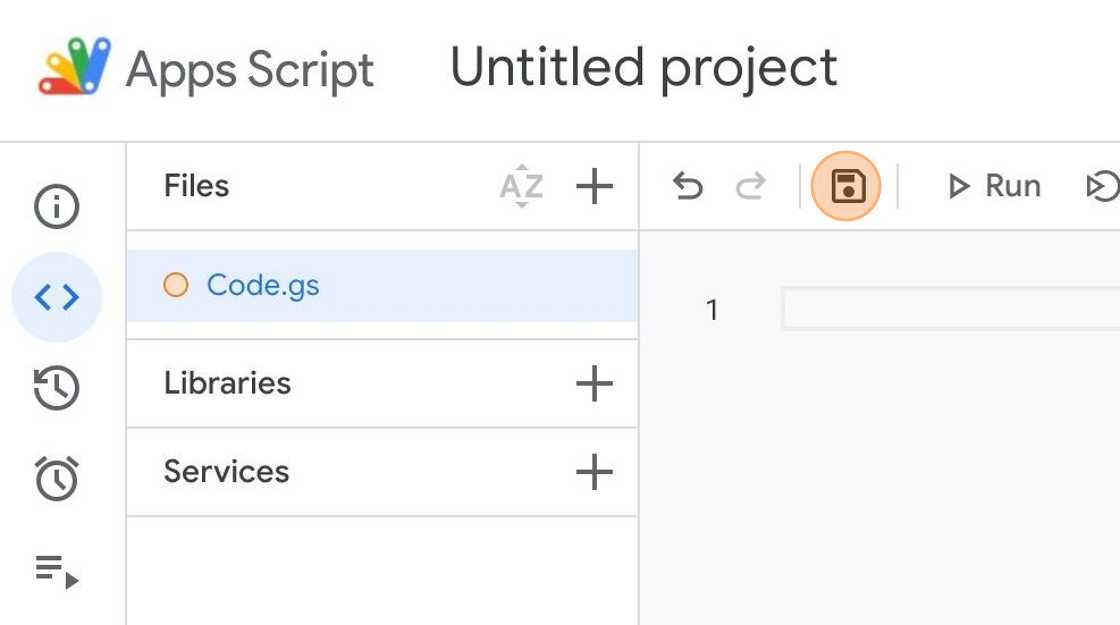
7\. After pasting, click on the floppy disk icon (from the editor's top navigation) which lets you save the code.
8\. Above the floppy disk icon, click on **Untitled project** and rename the project to the name of your MESA workflow for organization purposes.
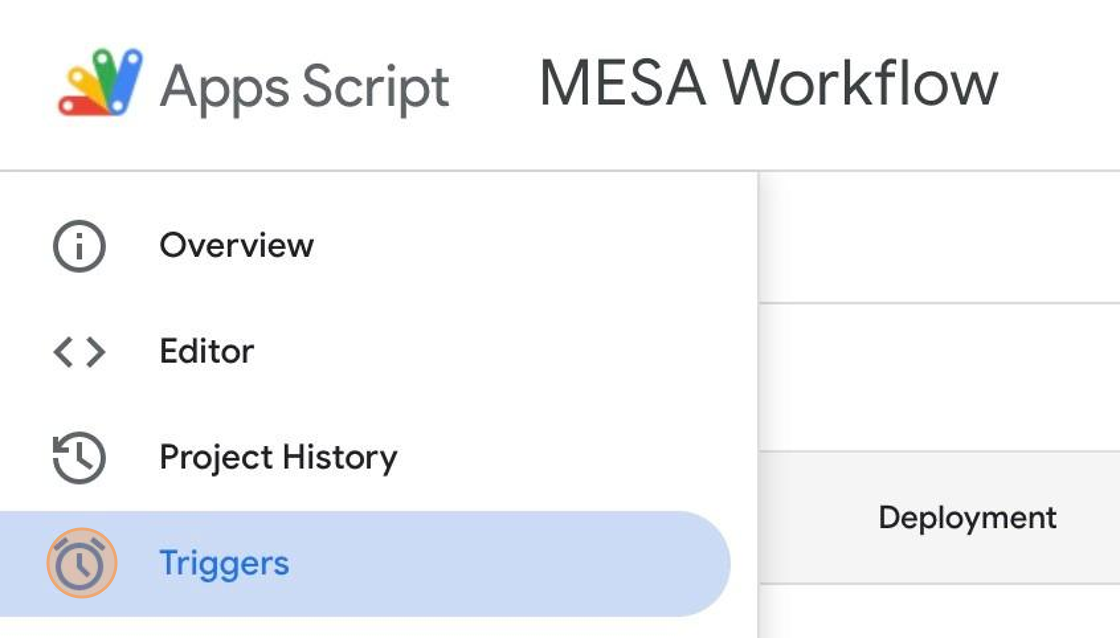
9\. On the left hand side bar, click on the clock icon labeled **Triggers.**
10\. On the Triggers page, click on the **+ Add Trigger** button.
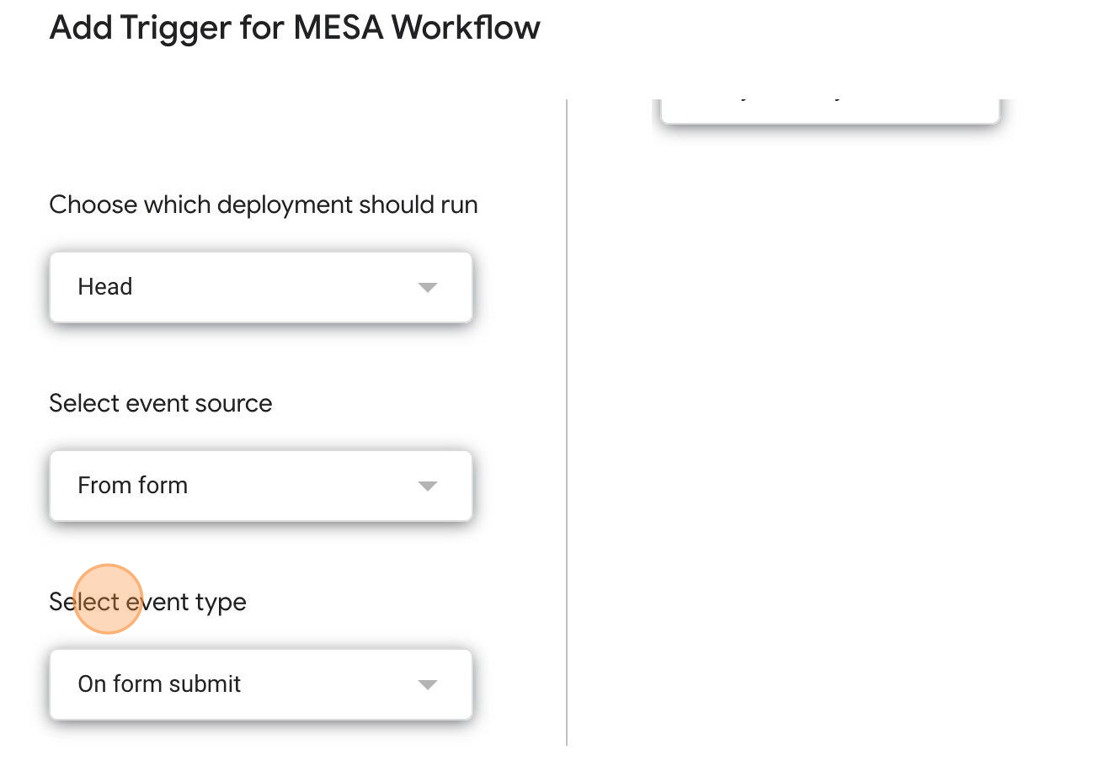
11\. Locate the **Select event type** field on the prompted modal. Change the dropdown menu selection to: **On form submit**.
12\. After clicking **Save**, make sure that you are prompted with a new browser tab to sign into your Google Account. If you do not see a new browser tab after clicking Save, you may have disabled pop-up notifications so please check your notification settings as well.
13\. Once you log into your Google account, you will be prompted to grant Google access to your Form. Click on **Allow**.
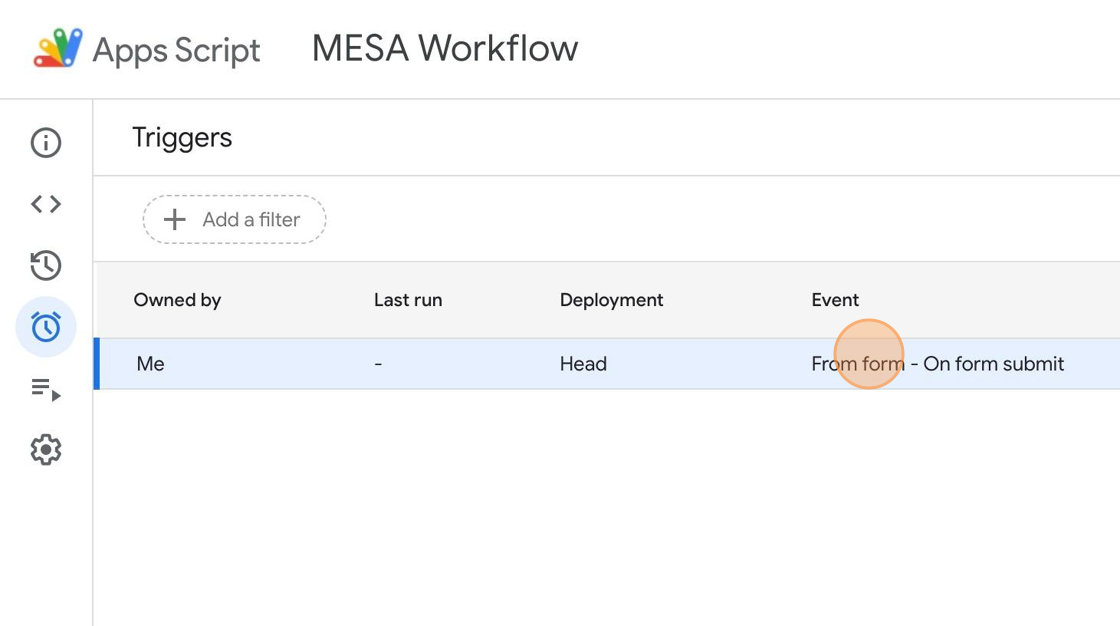
14\. When viewing the **Triggers** page (mentioned in step 9), refresh the page and make sure that a trigger has been created with the Event set to: **From form - On form submit.**
15\. After confirming, you are all set! If you'd like to manually run your workflow with the Google Forms trigger, read the section below titled **Manually run your Google Forms workflow**.
#### Manually run your Google Forms workflow
To manually run your Google Forms workflow, make sure that you enable your workflow first. Then, make a test submission on your Google Form via URL or some other method!
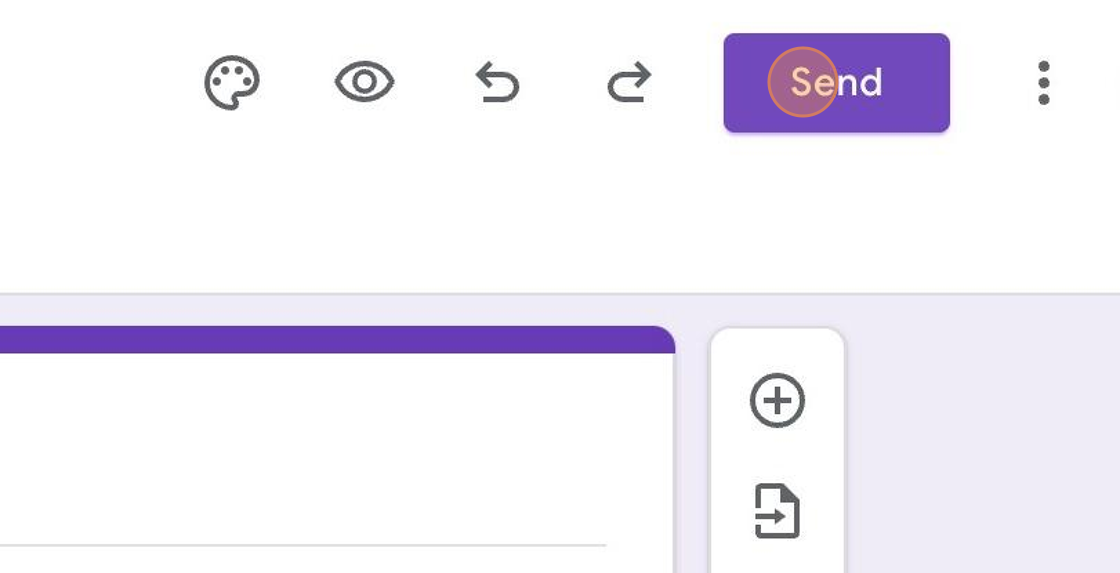
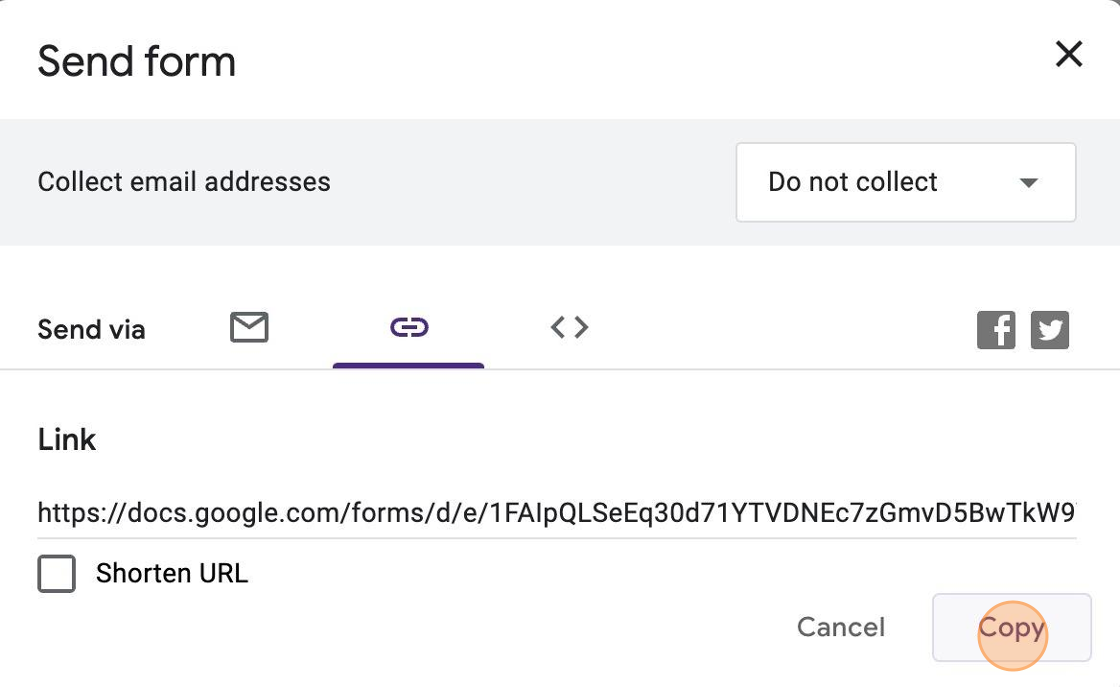
The easiest method is to click on the **Send** button when viewing your Google Form.
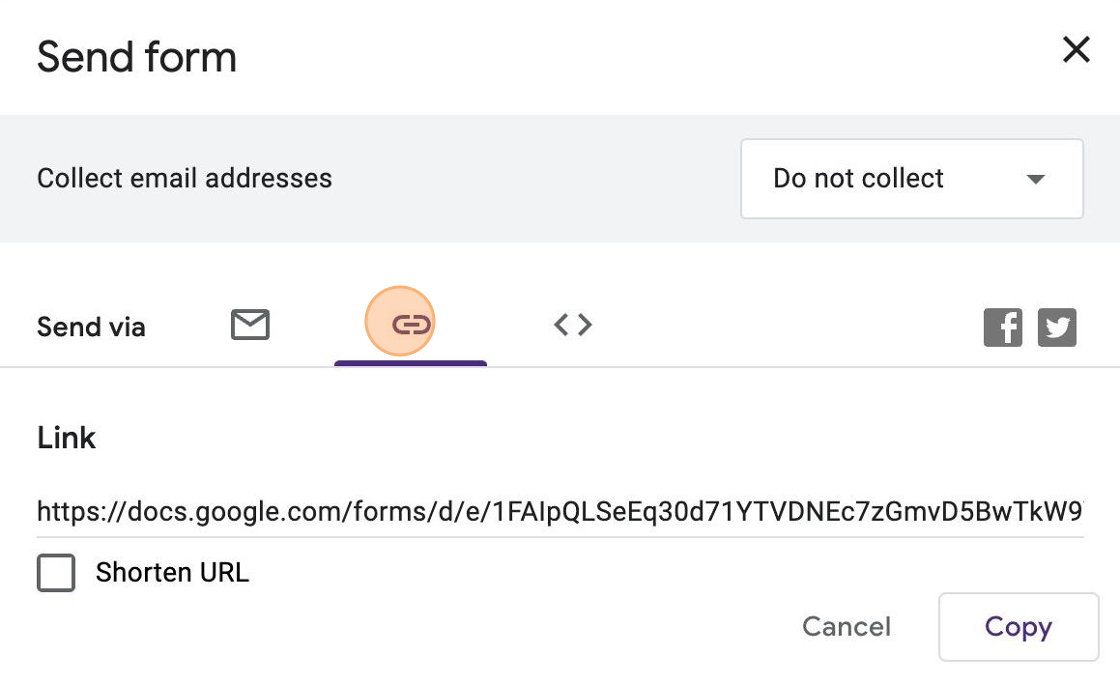
Then, click on the **Link** icon and click on **Copy**.
You can paste the copied URL into a new browser tab and fill out the form there. Your workflow should then trigger whenever the form is submitted.
#### Using a form's response data
After your Google Forms workflow is triggered, you will most likely want to send the response data to a third party service (e.g. Google Sheet, Airtable). You can use [MESA variables](/workflow-builder/fields/variables.md) in any of the later steps in your workflow. Variables are representations of data. When a workflow runs, variables are replaced with real data such as any of the data in the Form response.
If you have not already triggered the Google Forms workflow, you will see two variables associated to the Google Forms trigger by default. **Form ID** and **Submission ID**.
To select variables that represent data entered into your form's fields, you will need to trigger the workflow with all the available fields entered in. [Please read this section on how to manually run the workflow](#test).
Once the workflow is triggered, new variables will appear which will let you use them in later steps.
.png?alt=media&token=8726f11f-3e1a-4317-b047-559407ea1caa)
.png?alt=media&token=c438e4c3-fb0b-4e4a-b639-4976a822d4d7)