> For the complete documentation index, see [llms.txt](https://docs.getmesa.com/llms.txt). Markdown versions of documentation pages are available by appending `.md` to page URLs; this page is available as [Markdown](https://docs.getmesa.com/connect/mandrill.md).

# Mandrill

### Connection <a href="#connect" id="connect"></a>

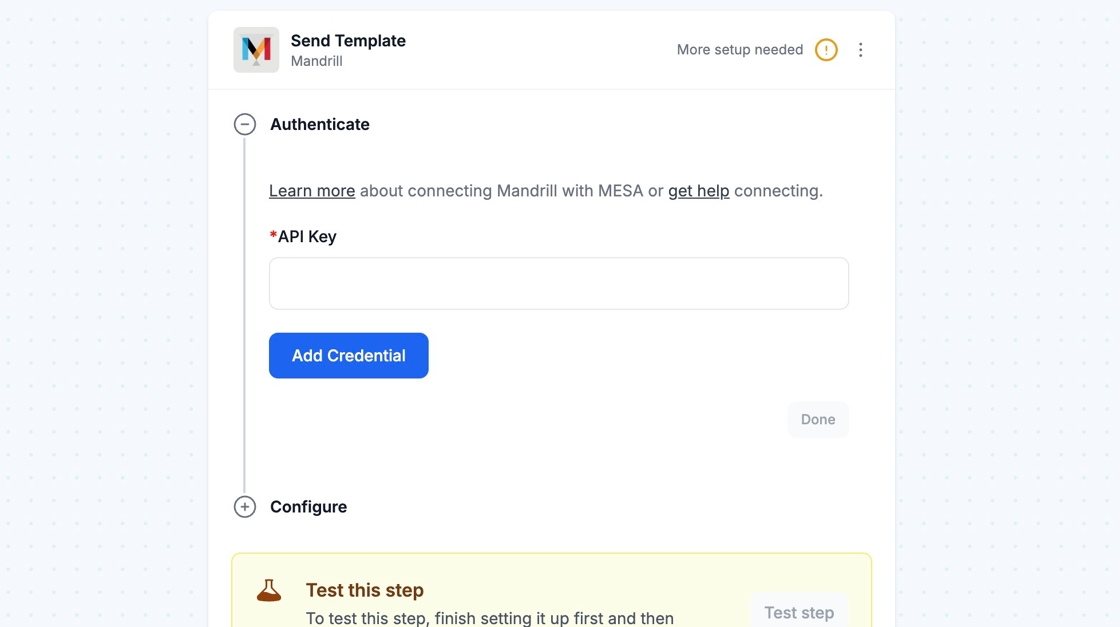
When you're setting up your first workflow with Mandrill, you'll need to add your API key so that Mandrill is a connected app within MESA. Mandrill is a paid Mailchimp add-on so you must have it [enabled in your Mailchimp account](https://mailchimp.com/help/add-or-remove-transactional-email/).

<figure><img src="https://3425906282-files.gitbook.io/~/files/v0/b/gitbook-x-prod.appspot.com/o/spaces%2F1H6u1HQc3Iew7ATmmiCi%2Fuploads%2F9A9U5FjzZZaELPGhIlwe%2Fimage.png?alt=media&amp;token=e6aafd2b-5f13-4991-8d4b-00934823a6b0" alt="Screenshot of the Mandrill step in the MESA workflow builder. Spotlight the API key connection field for Mandrill."><figcaption></figcaption></figure>

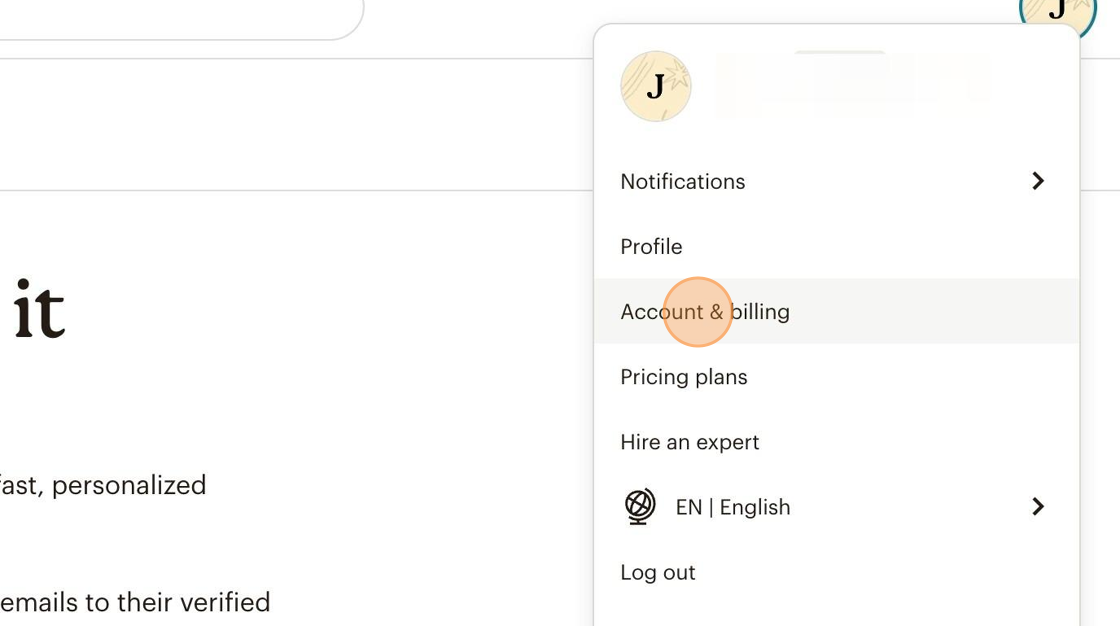
1\. You can locate your [API key](https://us4.admin.mailchimp.com/account/api/) by clicking your Account bubble, located at the top right on the Mailchimp Dashboard. Then, locate **Account and Billing** and click on it.

<figure><img src="https://3425906282-files.gitbook.io/~/files/v0/b/gitbook-x-prod.appspot.com/o/spaces%2F1H6u1HQc3Iew7ATmmiCi%2Fuploads%2FaUjqmAgeTZ44m1LoUxYK%2Fimage.png?alt=media&amp;token=db24eb56-4ab9-4a02-9ae4-0c8248f1434f" alt="Screenshot of the Mailchimp Dashboard, click your Account bubble in the top right. Spotlight the Account and Billing menu item."><figcaption></figcaption></figure>

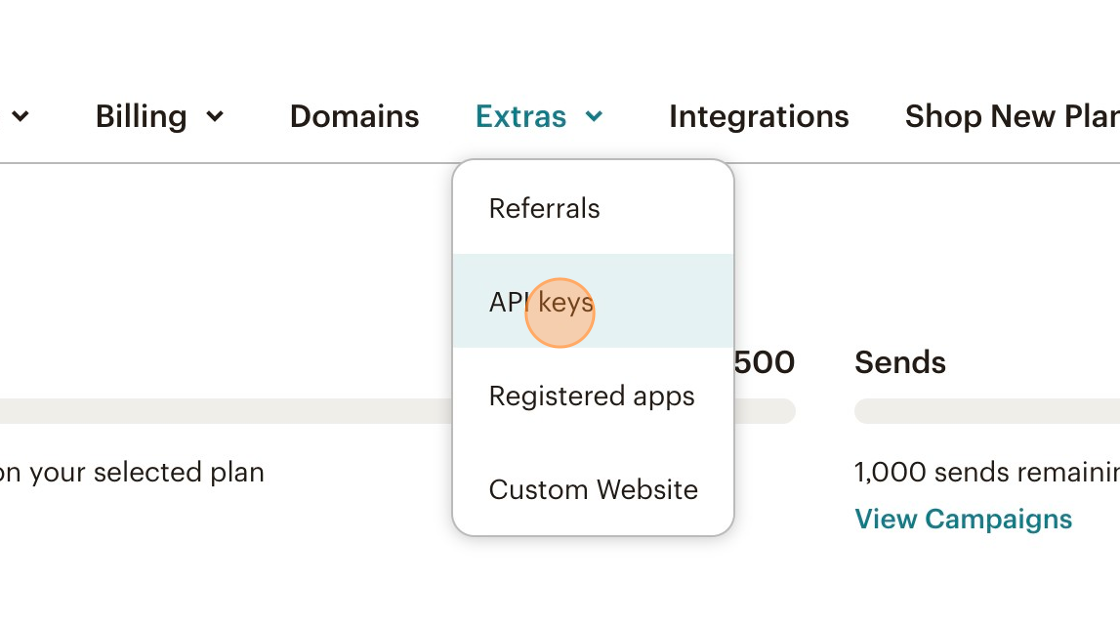
2\. Next, click on the **Extras** dropdown and select **API keys**.

<figure><img src="https://3425906282-files.gitbook.io/~/files/v0/b/gitbook-x-prod.appspot.com/o/spaces%2F1H6u1HQc3Iew7ATmmiCi%2Fuploads%2Fl8x4e354i10DQ7QjMooI%2Fimage.png?alt=media&amp;token=6ba16d2e-34ee-48e0-b978-e9e23b58d1ce" alt="Screenshot of the Mailchimp Account and Billing page. Open the Extras dropdown and spotlight the API keys option."><figcaption></figcaption></figure>

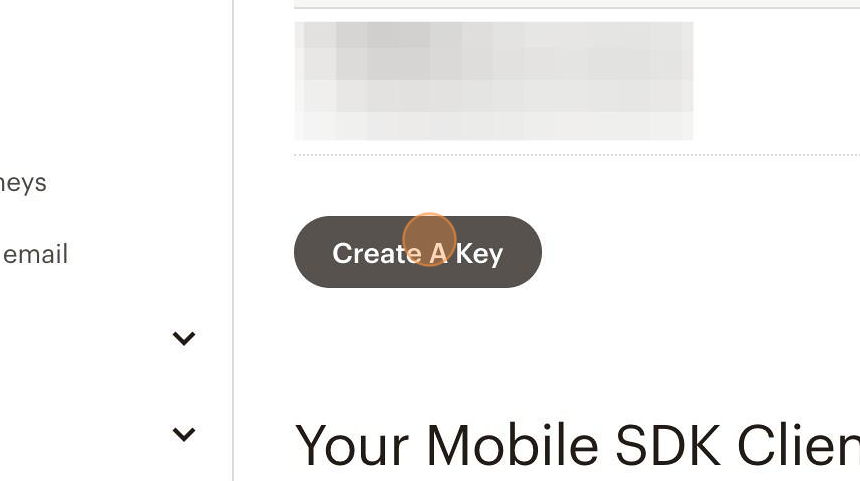
3\. Scroll down until you see **Your API Keys** and click on **Create A Key**.

<figure><img src="https://3425906282-files.gitbook.io/~/files/v0/b/gitbook-x-prod.appspot.com/o/spaces%2F1H6u1HQc3Iew7ATmmiCi%2Fuploads%2F0NOVeYiLL0vqFmRBAvjF%2Fimage.png?alt=media&amp;token=5d113b7f-e469-4125-88ab-87ecf1064645" alt="Screenshot of the Mailchimp API keys page. Spotlight the Create A Key button under Your API Keys."><figcaption></figcaption></figure>

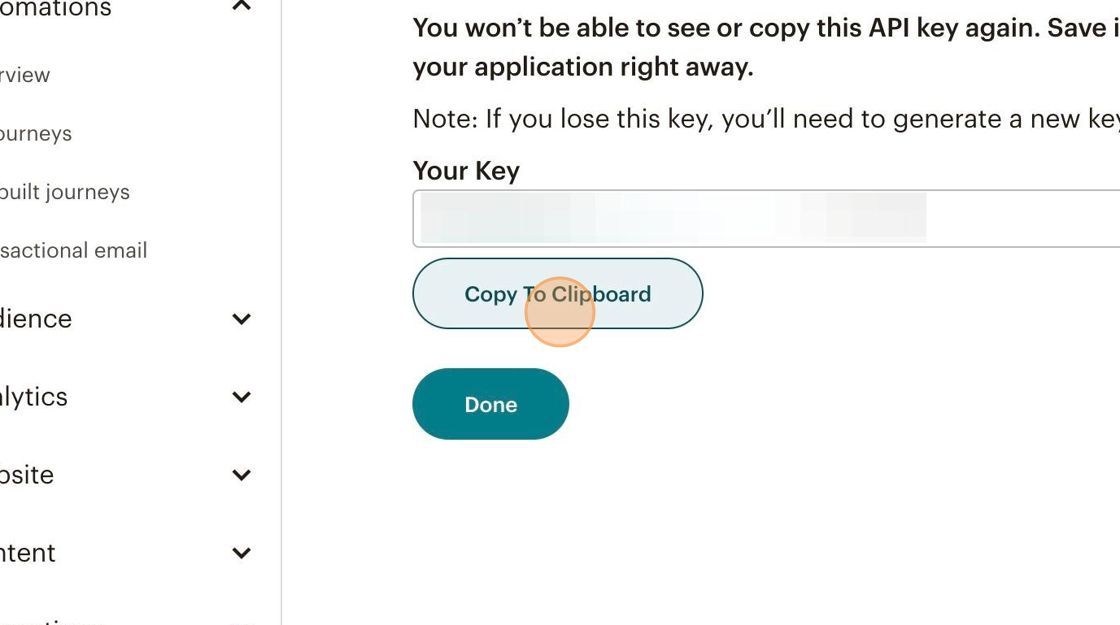
4\. Once you create an API key, copy the value via the **Copy to Clipboard** butto&#x6E;**.**

<figure><img src="https://3425906282-files.gitbook.io/~/files/v0/b/gitbook-x-prod.appspot.com/o/spaces%2F1H6u1HQc3Iew7ATmmiCi%2Fuploads%2FvYhr5YANLVaBDXyNyqbz%2Fimage.png?alt=media&amp;token=309ab49f-2b6f-47f7-8a95-5e119fe0903e" alt="Screenshot of the Mailchimp API keys page with a newly created key. Spotlight the Copy to Clipboard button."><figcaption></figcaption></figure>

5\. Then, paste that into your MESA's workflow's Mailchimp step and click on **Add Connection.**

Afterwards, you are all set and you can re-use the newly created connection for your future workflows!